The DrugTestNetwork (DTN) Drug & Alcohol Data Management system manages all the required information for random selection testing, pre-employment, post-accident, reasonable suspicion, return to duty, and follow-up testing, so your data conforms, without issue, to the DOT MIS Report. Occasionally, data corrections are needed so nuanced details can be managed without complication. Some corrections include making sure the Reason for Testing is consistent with the DOT guidelines. Another correction often required is the Mode (FMCSA, FAA, PHMSA, FRA, USCG, and FTA) and the covered-employee categories reported.
The DOT MIS Report breaks the data down by each Mode/Category represented by the employees who have submitted to drug and alcohol testing and participated in random selections. The MIS Report produces a separate page for each Mode/Category represented by the data. The no. of employees covered under each Mode/Category reported in the MIS is based on the average no. of employees who participated in random selections conducted within the period of the report.
Steps to Make the Required Corrections:
- Set the Mode in the account profile for all accounts that participate in testing.
- For the calendar period that will be covered by the MIS Report, review the random selection audit records that preserve a list of all the participants and make sure each participant’s Mode/Category, in the audit record, is properly set.
- Using the DOT MIS Analytics report, check that every test result properly states the Mode/Category for the donor.
Set the Mode for the Account:
Every personnel record for each participant must include the DOT Category for the Mode specified for the account roster. If the employer has employees under different Modes, a separate account is required for each mode: the DOT Mode applies to everyone in the roster under the account. To set the Mode for an account, search for the company and click the Account Profile Edit icon ![]() and set the Mode.
and set the Mode.
Set the Mode for each Consortium Member:
If you need to correct the Mode for Consortium member accounts, on the main page of the application, choose the Consortium in the drop-down, as shown below, and click the first icon ![]() , on the right, to list all member accounts:
, on the right, to list all member accounts:

When the accounts are listed, click the Profile Editor icon![]() and make sure the Mode for each account is properly specified as needed.
and make sure the Mode for each account is properly specified as needed.
Optionally, consortium member accounts can be listed from the Consortia Mgt page. Click the menu Consortia to open the page. Under the Consortia menu, all consortia in the subscriber’s account are listed with management options. To list the members for each consortium, click the option icon Show Accounts: ![]()
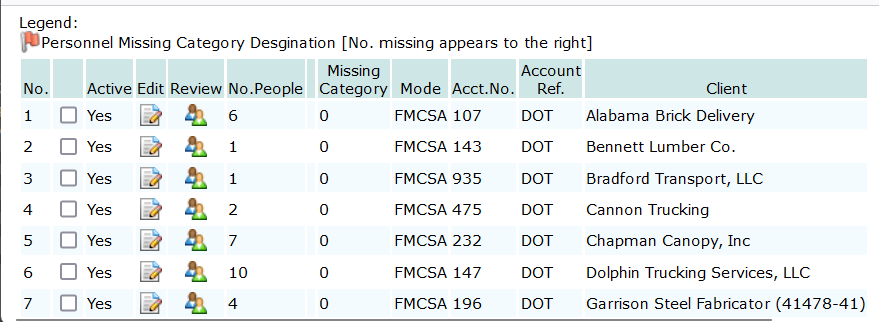
The listing will show each member account, its Mode, the number of active employees in the roster and a option icons to open the Account Profile Editor and the Personnel Management Utility. The list will also show how many personnel records in the roster are missing a Mode/Category specification. 
Audit Records:
When a random selection is generated the list of participants is saved as a permanent record. This record is used to count the number of participants in each random selection and calculate the average across the randoms selections that were conducted for the reporting period of the MIS Report. The audit record includes each person, and their Mode/Category, who participated in each random selection. An MIS Report page is provided for each Mode/Category represented. If Mode/Category modifications are required for the Account, the Mode/Category for each person in the audit record must be changed too in order for the MIS to correctly report the no. of employees covered.
Correct the Mode/Category in the Audit Record:
To change the Mode/Category for each participant recorded in the audit record, you’ll need to list the random selections that were generated for the account or the consortium. For random selections generated for individual accounts, search for the account and click the list randoms icon ![]() . For a consortium, choose the consortium from the drop-down as noted above and click the list randoms icon there on the right.
. For a consortium, choose the consortium from the drop-down as noted above and click the list randoms icon there on the right.
Enter the dates for random selections that were generated for the period of the MIS report. For each random selection, click the people icon ![]() to list everyone who participated in the random selection.
to list everyone who participated in the random selection.
When the list opens, choose the Mode/Category you want to apply to everyone in the list from the the drop-down selector:
To choose everyone in the list, put a check the check-box on the header line at the top of the list:

When everyone is selected, click the DOT icon![]() to apply the Mode/Category, specified in the drop-down, to everyone selected.
to apply the Mode/Category, specified in the drop-down, to everyone selected.
Test Result Reports Refer to Mode/Category and may need corrections:
After every participant’s Mode/Category has been set, you will need to set the Mode/Category for all the test result records that will be considered for the MIS report.
For an individual account, click the report icon ![]()
For a consortium, choose the consortium from the drop-down as outlined above, and click the report icon ![]() on the right.
on the right.
When the report module, opens, indicate the year of the report and choose the report:
After you set the year of the report, scroll down to select the MIS Report option:![]()
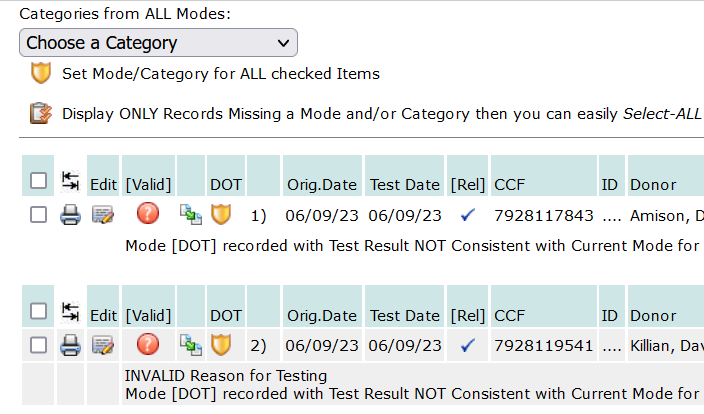
When the Analytics Report opens, you will find a Mode/Category drop-down (see image below) it will list all the drug/alcohol reports for the account or the consortium, depending on how you navigated to the report. Each drug/alcohol test result will show if it conforms to the MIS Report. For test results that do not conform to the MIS Report, the reason for the non-conformity will be shown under the test result record:
This example, above, shows the Mode/Category is not consistent with the Mode for the account to which the test result belongs. In the dropdown selection with all the Mode/Category options, choose the Mode/Category for the test result record, and check the box for each drug/alcohol test listed in the report (the checkbox is on the far left) that requires a Mode/Category correction.
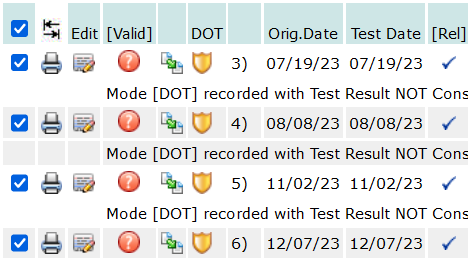
Check ALL Checkboxes in a single click: You will find a checkbox at the top of the list, when checked, it will automatically check the box for all the result records listed:
When all the check-boxes have been set as needed, click the Set Mode icon![]() , under the Mode/Category drop-down, shown in the image above, to set the Mode/Category to every test result record selected with a check-box.
, under the Mode/Category drop-down, shown in the image above, to set the Mode/Category to every test result record selected with a check-box.
When completed, you can generate the MIS Report with the Mode/Category corrected.
