Newsletter: Send Update Participant Roster Announcements

Use the Newsletter to Send each account their Current Participant List Prior to Random Selections

Before running a random selection, it’s important that client accounts have an up-to-date participant list. The Newsletter feature in DrugTestNetwork (DTN) allows you to easily send a message to multiple accounts at once with options to include their current personnel roster so it can be reviewed and updated.

Best Practice: Send this reminder a few days before generating a random selection to give clients time to make updates.

Access the Newsletter Feature

  1. Go to the Utilities menu
  2. Select Newsletter Utilities

Step 1: Enter the Email Subject and Message

  • Enter a clear Subject Line (required)
  • Compose your message
Suggested Subject: Review & Update Your Participant List
Suggested Message: Review your current participant list included here and make any necessary updates prior to the upcoming random selection. Ensuring your roster is accurate helps maintain compliance and prevents missed selections.

Step 2: Choose Who Will Receive the Email

After the sections Message and Closing Statement, you’ll see the section: Indicate the Extent of the Broadcast.  To send the email to a consortium, select Only Selected Consortium, and choose the consortium in the drop-down.

Tip: Use the selected consortium option when preparing a random selection for that specific group.

Step 3: Include the Participant List

The newsletter allows you to include each account’s current personnel roster directly in the email.

Select one of the following options:

  • Active — Only currently active participants
  • Active & Pending — Includes participants not yet fully active
  • ALL — Includes Active, Pending, and Not-Active participants
Important: The participant list cannot be sent when the extent of the email is Everyone - some client contacts (reps) may not be assigned to an account and a list cannot be determined in these cases.

Step 4: Preview or Count Recipients

Before sending, you have options to verify your email:

  • Preview (Show) — Opens a preview of the email
  • Count — Displays how many recipients will receive the message
Recommended: Always preview your message to confirm the message before sending.

Step 5: Send the Newsletter

Once everything looks correct:

  • Confirm recipients and participant inclusion settings
  • Review your message content
  • Proceed with sending the email

Workflow Tip: Preparing for Random Selection

Recommended Workflow:

  1. Send the newsletter requesting participant updates
  2. Allow time for client accounts to review and update their rosters
  3. Verify key accounts if needed
  4. Run the random selection with confidence that your data is current

Final Tip

Using the newsletter feature for participant updates is one of the most efficient ways to communicate with multiple accounts at once. A quick reminder before each random selection helps improve accuracy, compliance, and overall program quality.

SAP/EAP Follow-Up Randon Periodic Drug Testing

Random Periodic Drug Testing Strategies: Individual, Color-Coded, and Horizon-Based Scheduling

In modern drug and alcohol testing programs—particularly those supporting rehabilitation, drug court, family court, DOT compliance, and employee assistance programs—effective scheduling is critical. Testing must be random, defensible, scalable, and operationally practical.

Often, scheduling approaches often fall short when programs expand or when participant requirements vary. DrugTestNetwork (DTN) introduces a comprehensive framework that automatically generates periodic testing dates to adapt to multiple program models, ensuring both compliance and efficiency.

This article outlines the core scheduling methodologies available within DTN, including:

  • Individually scheduled periodic testing
  • Color-coded group testing
  • Fixed-date program scheduling
  • Open-ended horizon-based scheduling
  • Constraint-based randomization and failure handling

1. Individually Scheduled Periodic Testing

Individually scheduled testing generates a unique set of randomized test dates for each participant based on defined parameters:

  • Frequency (nDays) — number of required tests
  • Timeframe — number of days in the testing window

For example, a 2/14 configuration requires two test dates within every 14-day window. Each participant’s schedule is generated independently, ensuring:

  • Maximum randomness
  • Even distribution of testing volume
  • Reduced risk of predictable patterns

This model is particularly effective when participants report to a single clinic or limited number of collection sites, as it prevents operational bottlenecks caused by concentrated testing volume.


2. Color-Coded Testing (Group Scheduling)

Color-coded testing introduces a group-based scheduling model where a predefined set of randomized dates is generated for a Color Code (e.g., Red, Blue, Green).

Participants assigned to a color inherit that color’s schedule, meaning:

  • All participants with the same color test on the same dates
  • Administrative overhead is significantly reduced
  • Scheduling becomes standardized across groups

This model is highly effective in distributed environments where participants report to multiple clinics across a region, city, or state. However, it requires careful planning when participants share a single collection site, as simultaneous testing requirements may exceed capacity.


3. Fixed-Date Program Scheduling (Start/End Defined)

Many rehabilitation and court-ordered programs operate within a defined enrollment period. DTN supports fixed-date scheduling based on:

  • Program Start Date
  • Program End Date

Within this window, the system generates all required test dates according to the participant’s frequency and timeframe configuration.

This approach ensures:

  • Full coverage of the program duration
  • Compliance with court or clinical requirements
  • Clear visibility into all upcoming obligations

Fixed-date scheduling is commonly used in:

  • Drug court programs
  • Family court monitoring
  • Structured rehabilitation timelines

4. Open-Ended Scheduling with Extended Horizons

Not all participants have a defined program end date. For these cases, DTN introduces horizon-based scheduling, where test dates are generated forward into the future without requiring a fixed end date.

A configurable horizon (e.g., 90 days, 6 months) ensures that participants always have upcoming scheduled tests while avoiding unnecessary long-term projections.

With Nightly Extension enabled:

  • The system automatically extends future dates as time progresses
  • Participants never “run out” of scheduled tests
  • Administrative intervention is minimized

Additional logic prevents excessive generation by skipping participants whose schedules already extend sufficiently into the future.


5. Dynamic Rescheduling and Parameter Changes

When a participant’s testing requirements change—such as frequency or timeframe—DTN treats the update as a new scheduling profile.

The system:

  • Deletes all future scheduled dates (typically from tomorrow forward)
  • Regenerates dates using the updated parameters

This ensures:

  • Consistency with current program requirements
  • No overlap or conflict with prior scheduling logic
  • Clean transition between testing protocols

6. Constraint-Based Randomization

DTN’s scheduling engine incorporates real-world constraints to ensure both compliance and practicality:

  • Exclusion of specific days (e.g., weekends or holidays)
  • Exception calendars (e.g., clinic closures, holidays)
  • Non-consecutive day rules
  • Daily capacity balancing across participants

These constraints are applied during date generation to produce schedules that are both random and operationally viable.


7. Failure Handling and Audit Transparency

In certain scenarios, it may not be mathematically possible to generate all required test dates within a timeframe due to constraints.

Rather than failing silently, DTN:

  • Logs the issue with detailed reason codes
  • Continues generating remaining viable dates
  • Provides reporting for administrative review

This ensures transparency and allows program managers to take corrective action when necessary.


8. Operational Efficiency and Industry Impact

The combination of individual scheduling, color-coded grouping, and horizon-based automation positions DTN as a comprehensive solution for modern testing programs.

Key benefits include:

  • Scalable scheduling across thousands of participants
  • Reduced administrative overhead
  • Improved clinic load management
  • Enhanced compliance with regulatory and judicial requirements
  • Defensible randomization methodologies

Whether managing a small rehabilitation program or a large multi-site testing network, DTN provides the flexibility and control required to maintain both efficiency and integrity.


Conclusion

Periodic drug and alcohol testing is no longer a one-size-fits-all process. Programs vary in size, structure, geography, and compliance requirements.

By supporting multiple scheduling strategies—including individual randomization, group-based color coding, fixed program timelines, and automated horizon extension—DTN enables organizations to design testing protocols that align with their operational realities.

This flexibility, combined with robust constraint handling and audit transparency, establishes DTN as a leading platform in the drug testing and rehabilitation monitoring industry.

Participant List: eMail to Contact / DER

Sending a Participant List to a DER (Designated Employee Representative)

Keeping your clients informed is an important part of managing your program in DTN. You can quickly send a participant list to each company’s Designated Employee Representative (DER) — either in the email body or as a CSV attachment.


Step-by-Step: Send a Participant List

  1. Search for the Company
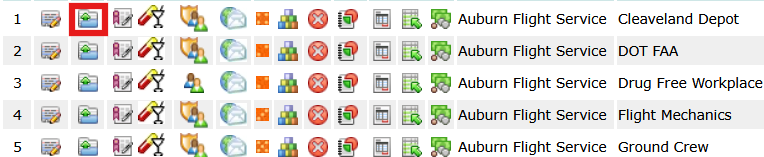
  2. Click the Email Personnel icon 
  3. Select the Recipient(s)
    Contacts for the company will appear with checkboxes.Ensure the DER is selected.Select additional contacts if needed.

Choose Which Participants to Include

Select the scope of participants to include in the list:

  • Active — Only currently active participants
  • Active & Pending — Includes participants not yet fully active
  • ALL — Includes Active, Pending, and Not-Active participants
Tip: Choose the option that best fits what your client needs to review. Most DERs prefer Active or Active & Pending.

Choose How to Send the List

  • Include in Email Body
    The participant list appears directly in the email message.Best for quick viewing.
  • Attach as CSV File
    Adds a downloadable spreadsheet file.Ideal for sorting and filtering.

Optional: Add Additional Recipients

You are not limited to saved contacts.

  • Enter a name and email address manually to include someone not listed
  • Add yourself to preview the email before sending
Preview Tip: Sending the email to yourself first is a great way to confirm formatting and content before delivering it to your client.

Use an Email Template (Recommended)

Save time by creating a reusable email template instead of writing messages from scratch each time.

To create or edit a template:

  1. Go to the Other-Data menu
  2. Select Mail/Text Messages & Other Documents
  3. Choose Current Personnel Roster
Efficiency Tip: Create a standard message for participant lists and simply make small edits before sending. This can save significant time when working with multiple clients.

Final Step: Review and Send

Before sending, confirm the following:

  • Correct recipients are selected
  • Participant scope is correct (Active, Active & Pending, or ALL)
  • Message content is accurate
  • List format is correct (email body or CSV attachment)
Final Tip: A quick review helps ensure your message is clear, accurate, and professional before sending.

About DOT Clearinghouse Queries

About DOT Clearinghouse Queries

The DOT Drug & Alcohol Clearinghouse requires employers (or their designated service agents) to run specific types of queries on CDL drivers for compliance. Each query type serves a different purpose depending on when the driver is being checked and what level of information is required.

DrugTestNetwork will output the data, formatted properly, into a file you can upload directly to the DOT through your Clearinghouse Account for a “batch” query.  You can create a file for multiple companies or an individual company and submit them all separately as needed.  Read about the Required File Format.

In batch (.txt) uploads, query types are commonly represented as numeric values:
1, 2, 3, and 4.


Query Type 1: Limited Query

Purpose: Confirms whether a driver has any drug or alcohol violations recorded in the Clearinghouse.

  • What it returns: Yes/No only (no violation details)
  • Consent required: General (standing) consent on file
  • When to use: Annual checks for currently employed CDL drivers (when consent is already on file)

Important: If a Limited Query indicates a violation exists, you must perform a
Full Query (Type 2) to view details.


Query Type 2: Full Query

Purpose: Retrieves detailed Clearinghouse information, including violation and Return-to-Duty status.

  • What it returns: Violation details, dates, RTD/SAP status (where applicable)
  • Consent required: Driver electronic consent for each Full Query
  • When to use: When details are required (e.g., after a violation is found or to confirm RTD status)

Full Queries are used whenever an employer needs the details behind a “violation found” result or needs to verify a driver’s eligibility status following a violation.


Query Type 3: Pre-Employment Full Query

Purpose: A mandatory Full Query performed before allowing a driver to perform safety-sensitive duties.

  • What it returns: Same detailed results as a Full Query
  • Consent required: Driver electronic consent
  • When to use: Pre-employment screening before hiring / onboarding a CDL driver for safety-sensitive work

Key point: A Limited Query (Type 1 or Type 4) cannot be used for pre-employment purposes.
Pre-employment screening requires a Full Query.


Query Type 4: Limited Query with Automatic Consent Request

Purpose: Runs a Limited Query (Yes/No only) and, if general consent is missing, automatically requests it from the driver.

  • What it returns: Yes/No only (no violation details)
  • Consent behavior:
    • If general consent already exists, the Limited Query proceeds normally.
    • If general consent is missing, the Clearinghouse automatically sends a consent request to the driver.
  • When to use: Annual Limited Queries when consent may be missing for some drivers (especially in large batch uploads)

Important: Type 4 still returns only a Limited result. If a violation is found, you must follow up with a Full Query (Type 2) to view details.


Quick “When to Use” Summary

  • Type 1: Annual Limited Query when general consent is already on file.
  • Type 2: Full Query when detailed results are required (including RTD/SAP status).
  • Type 3: Required Full Query for pre-employment screening before safety-sensitive work.
  • Type 4: Annual Limited Query when general consent may be missing; automatically requests consent if needed.

Rule of thumb:
Limited Queries (Types 1 & 4) answer: “Does a violation exist?”
Full Queries (Types 2 & 3) answer: “What are the details?”


Quick Comparison Table

Query Type Name Returns Details? Consent Typical Use
1 Limited Query No (Yes/No only) General consent Annual checks
2 Full Query Yes Electronic consent Details / RTD status
3 Pre-Employment Full Query Yes Electronic consent Pre-hire screening
4 Limited Query with Automatic Consent Request No (Yes/No only) Auto-requests general consent if missing Annual checks at scale

When One or Both Parts of a Random Test are NOT Collected

A Random Test, sometimes requires both a Drug and a separate Alcohol test. However, there are cases when only one component of the test (e.g., drug or alcohol) was actually conducted. This can happen for a number of reasons. For some compliance considerations, you may want to record why the test was not conducted, and indicate a reason in the report record, for each test component not conducted. If the Date of Collection is set, the test is considered collected and will count toward the annual random selection percentages.  Keep in mind, if a random drug test record is not completed, it will not create any issue with your data or statistical reports.  The record simply exists as an incomplete random test. If you issue non-completed random test reports to the client, these tests will continue to be included.  Random test result records with a collection date or an Overall Qualitative Result are considered resolved. If you resolve the record, the tests will not be included in the non-completed reports.  However, if you don’t want the tests to contribute to the annual percentages, you can leave the collection date blank or, if you enter a collection date, you can use a special Overall Qualitative Result (OQR) that has its attribute set that prevents the test from getting counted as a collected test.  When you use a special OQR, the collection date can then serve as the date the record was resolved.

For example, you might consider these OQRs:

  • Not Conducted
  • No Longer Employed
  • Test Overlooked
If an OQR has the attribute set, Does NOT Contribute to Random Selection Statistics, it prevents the test from getting counted.  See below for instructions to add these OQRs if they are not already in your database.

For tests that were not conducted, follow the guidance below:

Open the test result in the Full Record Editor where you can manage the OQR for the drug and alcohol tests.

You have three options:
Option 1: Omit the Specimen Type

In the Full Record Editor, where you see “Specimen Type” for the drug or “Alcohol Test” for the type of alcohol test to conduct, select the option: Not Tested (or blank if Not Tested isn’t found). Using the option implies the test was not required.
This indicates that no test was required or performed for that portion.
The test result will not be included in the random selection statistics.

Option 2: Use a Special OQR (Overall Qualitative Result) that prevents the test (drug or alcohol) from getting counted. If a collection occurred but one part of the test was overlooked, you can set the OQR for that component using one of the special OQRs.

Option 3: Use OQR Participant Is No Longer Employed

In some cases, the participant may no longer be employed by the company at the time of the scheduled test. The user may still wish to complete the record for data management purposes.

This allows the record to be marked complete while excluding the test from statistics.

To add new OQR with the special attribute:

  1. Navigate to: Other-Data and tap the option: 
    Test Result Codes: Overall Qualitative Results [OQR]
  2. Tap the option to add a new OQR, such as:Test Collection Overlooked
  3. Set check-box for the attribute: Does NOT Contribute to Random selection statistics (see image below).
  4. In the Full Record Editor, apply this OQR to the drug or alcohol component that was not collected.

This ensures that:

  • The urine (drug) test does not count toward annual random selection stats.
  • The Collection Date still applies — for example, to record the alcohol test.

Summary Logic

  • If a Collection Date is entered:
    • The test is normally counted for statistics.
    • Unless the Specimen Type is blank or the selected OQR is set to one marked  Does NOT Contribute to Random selection statistics.

Tip

Use these procedures for cases such as participant not available, overlooked test, or no longer employed. These methods help you maintain a complete record while ensuring your random test statistics remain accurate.

Personnel Menu: Cleaner Presentation

In DrugTestNetwork, the Personnel menu lets you search for people (donors, participants, employees, etc.) across all accounts.  When you find the person you can edit their profile, open their dashboard, create a new drug / alcohol test result record, get a list of all their drug and alcohol test result reports, and more.

The feature now has a new streamlined presentation for less clutter on the page with the same full control of the search.

Click the about icon  to get an overview how search works.

Click the services icon   to read how to easily manage the search options.

Click the wrench icon  to open the Search Options Panel where you’ll find all the options fully presented similarly as in the earlier version of the feature.

Use compact icons  to cycle through search options without clutter.

How to Use the Search Tools

1. Cycle Through Options Using Icons

  • Each of the four search option categories shows an icon control  that cycles through the options in that section when clicked.
  • The label beside the icon updates to show your current selection.

2. Open the Full Search Panel

  • Click on the wrench icon or the label Open Options Panel.
  • Review and change all filters, including Name and ID fields.
  • Choose:
    • Search – run the search immediately
    • OK – apply changes and close the pane


New Feature: Contact Dashboard with Address Copy Tools

There’s a new feature in the Client-Mgt module of DrugTestNetwork.com.

When you open Client-Mgt, you will find the the contact(s) assigned to the account on the Client Dashboard section or you can open the Contacts section where all contacts for the client are listed.

Click the icon  presented next to each contact to open their dashboard.

Open the profile editor or launch the Contact Dashboard directly from the contact list. The dashboard view presents key contact information and management features for the contact.

What’s New

  • New Formatted Dashboard for the Contact:
    After editing and saving a contact’s profile, the contact’s dashboard is presented to acknowledge the record has been saved and provide management utilities for the contact, for example: open the contact profile editor, send an email, account assignments, etc.
  • Quick Access to Contact Info:
    The dashboard also features the contact’s address, phone numbers and email, making it easy to reference or verify at a glance.
  • One-Click Copy Address Tool:
    A new Copy button next to the address allows users to copy the full address to the clipboard with a single click—ideal for emails, shipping labels, forms, or internal notes.

This update is part of a continued effort to make client management easier, richer, and more intuitive for our users. Whether you’re editing contact details or simply referencing client addresses, the new dashboard view brings everything you need into one simple interface.

Hidden Feature: Print or Copy Contact Addresses from Reports

Hidden Time-Saver: Click the Company Name to Access Mailing Tools

There’s a hidden feature built into the Test Result Report page when it’s displayed for printing and provides a convenient way to print the company address when you need to mail the report to the recipient.

When viewing a printable version of a test result report, click the company name at the upper right of the page to open a helpful popup. This feature is designed for those times when you need to mail a physical copy of the report to a company contact — and it makes the process easy.

Here’s what the popup includes:

  •  Full Contact List for the Client
    Quickly browse all representatives associated with the company. Whether you’re mailing results to HR, a DER, or another contact, just pick the appropriate recipient.
  •  Printable Address Option
    Print a formatted mailing address directly from the popup — perfect for envelope labels or cover sheets.
  •  Dashboard with Copy-to-Clipboard Feature
    Want to paste the address into a Word doc, label template, or email? There’s a link to the contact’s dashboard that includes a one-click “Copy Address” feature.  When you click the address from the report to open the Print Address feature, every contact for the client is listed.  Use the radio button to select a contact with their mailing address.  Also, appearing next to each contact is the dashboard icon.  Click the icon to open the dashboard for the contact where you will find a feature to copy the contact’s address to your clipboard which you can use to paste (ctrl-v)  into a Word document, for example.

This feature is designed as a link in the text of the address on the report so there are no extra visible icons or instructions that clutter the presentation of the report and stays out of the way unless you need it. And when you do, it will save time and eliminate the need to dig for addresses elsewhere in the system.


Try it next time you view a test result report — just click the company name to explore.

Menu Navigation Changes: Randoms [List Randoms]

From the main menu, the menu choice Randoms, navigated to the module that lists random selections for all accounts and consortia for dates specified by the user.  The page also included other report options the developers felt did not best serve the user from that page.  Since the change, in order to navigate in a single click directly to the List Randoms module, you will find a new short cut icon under the menu:

The updated menu now navigates to a page that presents the List Randoms option as the first link on the page, and includes a variety of other reports to help users better manage random selections.

The first option on the page is where the Randoms menu previously navigated: List Randoms by Date.  The other options on the new page provide data management reports so users can list accounts that need randoms conducted by a scheduled date.  You will also find a link to a feature that send emails to accounts with a notification of upcoming randoms so they can update their participant list.

For many DTN subscribers, random selections are not conducted for every account, as a Stand Alone account or as a member of a consortium.

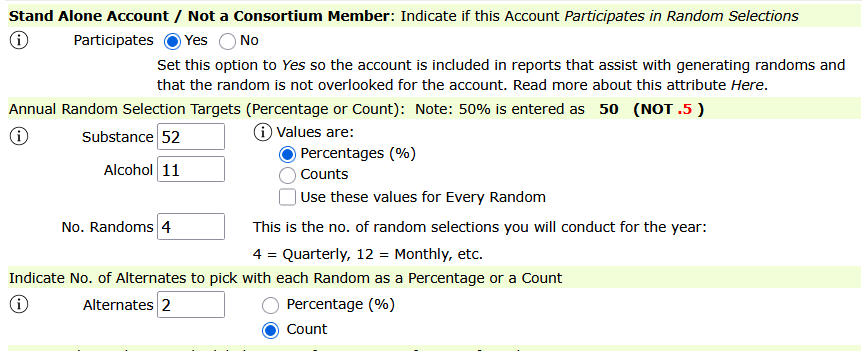
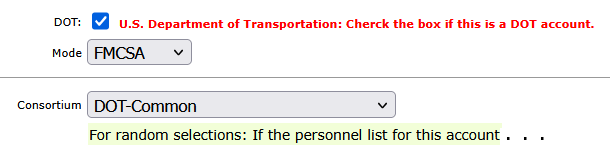
For an account to be included in reports related to random selection, the account must be a member of a consortium, or considered Stand Alone. To be a Stand Alone account for random selection report considerations, its Random Selection Participant attribute must be turned ON (set to Yes).  You will find the attribute, Random Selection Participant, (Participates in Random Selections) in the account profile editor under the section: Random Selection Parameters.

Stand Alone Accounts & the Random Selection Participant Attribute:

An account that’s a member of a consortium is automatically considered a random selection participant.

If an account is not a member of a consortium, it’s considered a Stand Alone account, however, Stand Alone accounts are included in random selection summary reports, scheduled random selections, and mass emails regarding random selections, only if its Random Selection Participant attribute is set to Yes.

Use the report Report Accounts Not flagged as Random Participants (Non-Consortium Members to list all Stand Alone accounts (i.e., non-consortium members ) whose account attribute, Random Participant, has not been turned on. The report includes a link to open the account profile editor, or turn the attribute ON for multiple selected accounts.

Email Notification:

On the new page, you will find the email utility to send notifications that random selections will be conducted soon so the account can update their participant list. The email is sent to all consortia member accounts, and Stand Alone accounts whose account attribute, Random Participant, is set to Yes.

Scheduled Random Selections:

You can specify the date to generate the next random selection for every Stand Alone account, and although the platform does not automatically generate random selections on these scheduled dates, there are reports available on the new page to list accounts by their scheduled date so the TPA can easily manage randoms and helps ensure every account stays in compliance.

Accounts without a date specified for the next Random Selection:

You will find a report to list all accounts that do not have a specified date for their next random selection.

To generate random selections by date, the random selection profile for the account must include a date, Next Random, to indicate when the selection is anticipated. When the random is generated, the date will roll forward, based on the Frequency, however, a scheduled date must first be specified.

Note:  Frequency is a random selection profile attribute and determines how the scheduled date is rolled forward when a random selction is generated.  The date is rolled forward to be consistent, i.e., the order of the day-of-week, with the earlier date.  If the earlier date is the third Thursday of the month, then the rolled forward date will also be the third Thursday of the month.

These are the current Frequency attributes you can choose:

    • Weekly
    • Monthly
    • Quarterly
    • Bi-Annual
    • Annual

This report will list all Stand Alone accounts that do not have a date yet specified. For an account to be considered Stand Alone, the account attribute, Participates in Randoms, must be turned ON. You’ll find this attribute under the section Random Selection Parameters in the Account Profile editor. Also note, this page  provides a report that lists all accounts that do not have the Random Participant attribute turned ON.

Generating Random Selections by Schedule:

You can list Accounts by their date scheduled for the next random selection.

This option lists accounts with a scheduled date within a calendar period specified by the user. This feature is designed to help easily generate randoms so accounts are not overlooked. When you generate a random selection, the Next Date is rolled forward based on the Frequency attribute defined in the account’s random selection profile.

From the report you can easily generate a random selection for each account listed using the familiar random selection control. You can also select multiple accounts, with a check-box, and generate the random selection for all of them in a single request.

Note: The system does not automatically generate randoms – the user must initiate the randoms manually. The user can generate randoms for multiple accounts in a single request.

Random Selection Summary Reports:

You’ll find the four summary reports on the new page.  In an effort to improve the List Randoms module, those reports were removed and added to the new page.

1. Summarize Randoms Conducted for ALL Accounts:

This report shows random selections for all accounts, including each account’s annual percentage targets and accumulated Year-to-Date (YTD) percentages (based on the average number of people over the number of randoms conducted) for both the substance and alcohol test.

2. Show ALL Random Participants with ZERO Randoms:

This report shows all accounts flagged as a Random Selection Participant (meaning it is an account for which you planned on generating a number of random selections for the year) for which no random selections have yet been generated.

3. Summarize Consortia Random Selections:

This report shows all the random random selections conducted for each consortium defined for your installation, including their annual percentage targets and their accumulated Year-to-Date (YTD) percentages (based on the average number of people over the number of randoms conducted) for both the substance and alcohol test.

NOTE: This report does not include random selections for accounts included in random selections for a consortium. Also, random selection test results that were created as the result of a consortium random selection are not included in the accumulative numbers for YTD percentages.

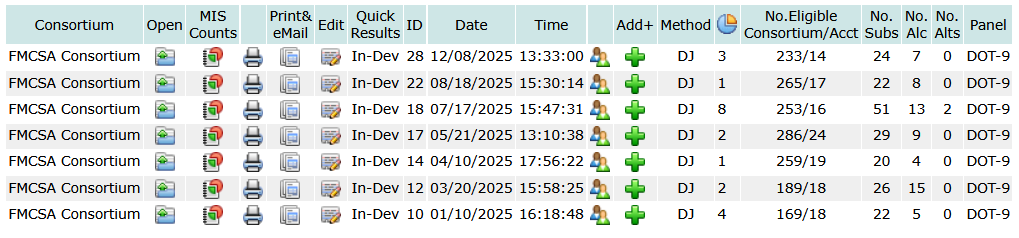
4. Less Than / More Than / Exactly: Summarize No. of Randoms Conducted:

For Stand Alone accounts you can use this summary report to list accounts that have not had enough selections yet generated.

For example, the numbers in the screenshot below will report all accounts that have been scheduled for 4 randoms (quarterly) but have had less than 4 random selections generated, to date.


DrugTestNetwork’s Drug & Alcohol Testing and Reporting Software

DrugTestNetwork’s Drug & Alcohol test reporting software streamlines the management and reporting of drug and alcohol testing programs, for DOT compliance and Drug Free Workplace, with features like electronic ordering, real-time results, random selection, and compliance reporting and more.

An overview of what the management and reporting software can do:
Key Features and Benefits:
  • Electronic Ordering and Scheduling: Order and schedule drug tests, alcohol tests, and physical exams electronically.
  • Real-time Results and Reporting:Access and record test results and generate reports in real-time.
  • Random Selection Management:Easily manage random drug testing programs, including generating random selection lists and tracking compliance.
  • Compliance Tools: Help ensure compliance with federal and state laws and regulations.
  • Collection Site Locator:Locate nearby clinics that offer drug testing services.
  • Electronic Chain of Custody (eCCF): Some software incorporates electronic chain of custody for increased accuracy and efficiency. (In development)
  • MRO Integration: Integrate with Medical Review Officers (MROs) for efficient result interpretation and management.
  • MRO Solutions: The platform provides data management and reporting for MROs as well as TPAs.
  • Data Management:Securely store and manage employee data, test results, and other relevant information.
  • Reporting:Generate various reports, including DOT MIS reports, and custom reports.
  • Cloud-Based Solutions:DrugTestNetwork is on online software solution, (cloud-based), offering accessibility and automatic backups.
  • API Solutions: DrugTestNetwork can build API solutions for integration with other systems when needed.

This article was written with the objective to address users interested in online software / application platform solutions for the following:

Drug Testing Program Management Software
drug test reporting software
Drug Testing Administration Software
cloud based software for the management of drug and alcohol testing, random selections, Medical Exams / dot physicals

DOT MIS Report: Management Information System

What does MIS stand for in the name: DOT MIS Report?

In the context of the U.S. Department of Transportation (DOT), “MIS” stands for Management Information System, which is a system used to collect and report drug and alcohol testing data from employers regulated by the DOT.

Here’s a more detailed explanation:
  • DOT Regulation:
    The DOT regulates workplace drug and alcohol testing for federally regulated transportation industries, outlined in 49 CFR Part 40.
  • MIS Reporting:
    Employers regulated by the DOT are required to report their annual drug and alcohol testing data to the DOT’s Management Information System (MIS).
  • Data Collection:
    The MIS form is used to collect data on employer information, covered employees, drug testing data, and alcohol testing data.
  • Submission:
    Employers must submit the MIS report in accordance with the requirements established by the DOT agency regulating their operation.
  • Examples of DOT Agencies:
    The DOT includes agencies like the Federal Motor Carrier Safety Administration (FMCSA), the Federal Aviation Administration (FAA), and others.
  • MIS Data Collection Form:
    The form is referenced in Appendix J to part 40 of the DOT regulations.
  • Importance of MIS Reporting:
    MIS reports are used to track and analyze drug and alcohol testing data to ensure compliance and improve safety in the transportation industry.
  • DAMIS:
    The DOT’s Drug and Alcohol Management Information System (DAMIS) is the system where the reports are submitted.

DrugTestNetwork (DTN) is an online data management system for drug and alcohol testing and provides comprehensive utilities for users/subscribers to manage every detail of the DOT MIS report.  Every drug and alcohol test reported on the DOT MIS Report conforms to specifics criteria in order to be included on the report: Reason for Testing, Overall Qualitative Results, Refusals, Shy Bladder, Shy Lung, etc.  DTN insures every drug and alcohol test conforms to the requirements of the MIS Report, and if a test result falls outside the reporting requirements, it is flagged so the user can easily correct the data for accurate reporting. DrugTestNetwork is an absolute solution for drug test reporting software.  In addition to the DOT MIS report, DTN also provides a MIS report for Non-DOT reporting as well.  The Non-DOT version is similar to the DOT MIS Report, but includes broader reporting features to include any and all Reasons for Testing and Overall Quatitative Results (OQR).  DrugTestNetwork’s drug and alcohol testing and reporting software makes compliance with DOT Regulations easy to manage.


Email Notification for Expirations & Renewals

Staying ahead of expirations and renewals (Driver’s License, B1-Visas, Medical Exams, ClearingHouse, etc.) can be critical for DOT compliance.  DrugTestNetwork provides a resources to help employers and TPAs manage expirations and renewals efficiently with an automatic email notification feature. This feature automatically sends emails to alert a company of these critical dates for employees.

With this feature, important deadlines for medical certificates, DOT physicals, driver’s licenses, and other essential compliance documents are automatically reported to the primary contact on the account. It alleviates manual tracking, having to remember to check for expirations and send notifications,  and reduces last-minute surprises. Every week, clients will receive timely reminders, giving them ample time to take action.

By automating these critical notifications, DrugTestNetwork helps TPAs enhance service reliability, strengthen compliance efforts, and improve communication with clients—all while reducing the administrative burden of manually tracking expirations.

What’s Covered?

This feature provides notifications for upcoming expirations & renewals related to:

  • Medical Certificates
  • DOT Physicals
  • Driver’s Licenses
  • B1 Visas
  • Motor Vehicle Reports (MVR)
  • DOT Clearinghouse Compliance
  • Program Memberships

How It Works

  • Every Sunday night, the platform will send an email to the primary contact for the account, listing personnel whose expirations or renewals are due within the next three weeks.
  • Notifications will also include personnel whose expiration dates have already passed, helping to identify outstanding compliance issues.
  • Every email sent is saved in your email log, allowing you to track all notifications and resend if needed.
  • If an account does not have a primary contact assigned or the contact does not have an email address, you’ll receive a separate notification so you can address the issue.
  • The email log makes it easy to resend notifications when needed.
  • You will receive a summary report of all the accounts included in the notification broadcast.